The carousel is hurting your website.
It looks slick in a demo. But the data, and accessibility standards, tell a very different story. Here's why we're recommending something better.
of visitors ever click on a carousel
(Notre Dame University)
of visitors ever click on a carousel
(Notre Dame University)
Step 2: Add Your Website as a Domain Property
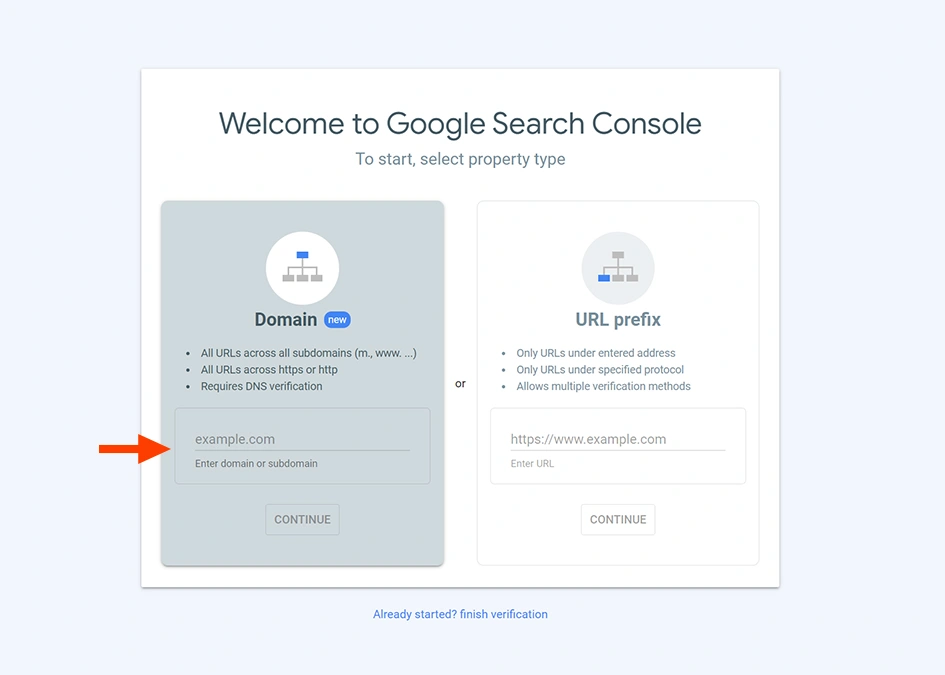
- You'll see a box asking you to add a property to Search Console
- Choose the "Domain" option on the left side (not "URL prefix")
- In the text box, enter your domain name exactly like this:
yourwebsite.com- Important: Don't include "www" or "https://" - just the basic domain name
- Example: If your website is
https://www.mybusiness.com, just entermybusiness.com
- Click the "Continue" button

Step 3: Verify Domain Ownership
Google needs to confirm you own this domain. You'll see a verification screen with several options.
Choose DNS Record Verification (Recommended)
- Select "DNS record" from the verification methods
- You'll see a TXT record that looks something like:
google-site-verification=abc123xyz789... - Copy this entire code - you'll need it in the next step
Add the DNS Record
Option A: Contact Your Web Host/IT Person
- If you're not comfortable with technical settings, contact your web hosting provider or IT support
- Tell them: "I need to add a TXT DNS record for Google Search Console verification"
- Give them the TXT record code you copied
Option B: Add It Yourself
- Log into your domain registrar or hosting provider's control panel
- Look for "DNS Management," "DNS Records," or "Domain Settings"
- Find the option to add a new record
- Select "TXT" as the record type
- In the "Name" or "Host" field, enter:
@(this represents your root domain) - In the "Value" or "Data" field, paste the Google verification code
- Save the changes
Complete Verification
- After adding the DNS record, wait about 5-10 minutes
- Return to Google Search Console
- Click the "Verify" button
- If successful, you'll see a confirmation message
Note: DNS changes can take up to 24 hours to fully propagate, so don't worry if it doesn't work immediately.
Step 4: Add Your Sitemap
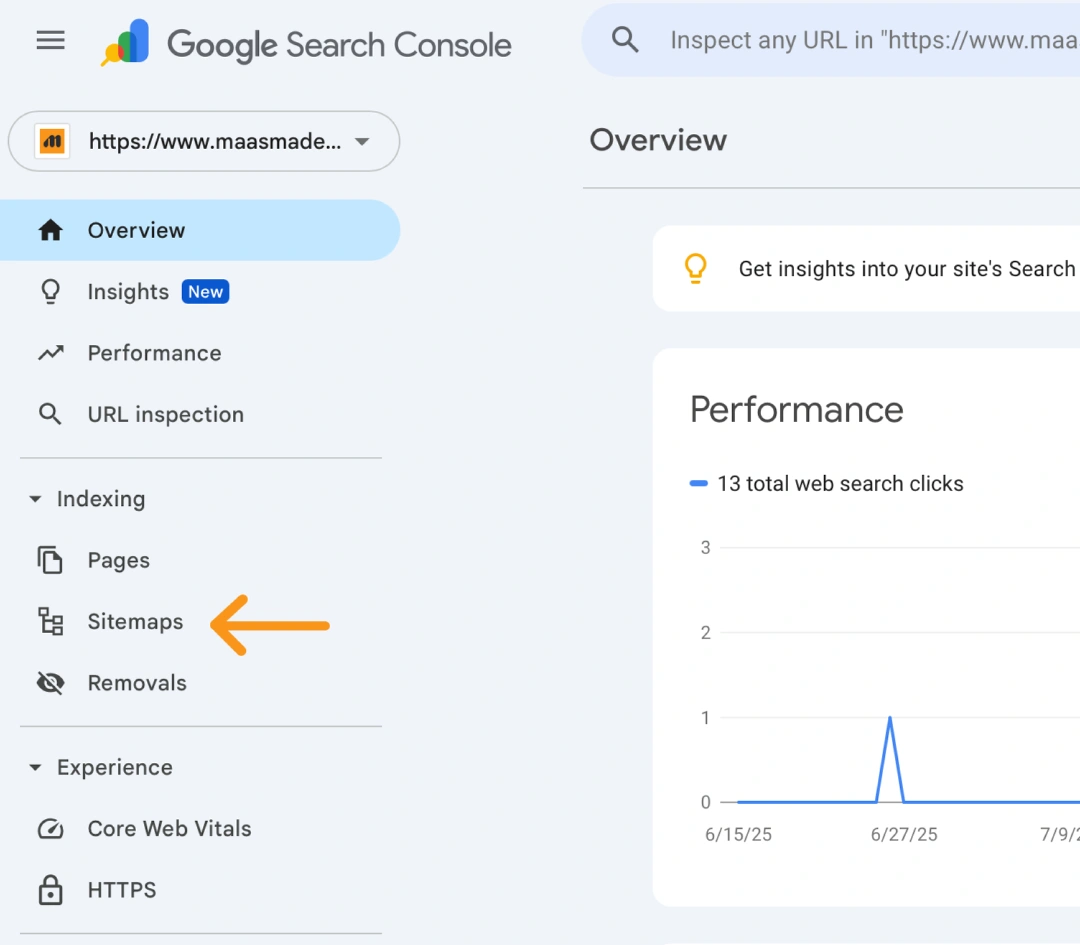
Once your domain is verified:
- In Google Search Console, look for "Sitemaps" in the left sidebar menu
- Click on "Sitemaps"
- You'll see a box that says "Add a new sitemap"
- Enter your sitemap URL in the text box
- Most websites have sitemaps at:
sitemap.xml - Just enter
sitemap.xml(not the full URL) - If you're unsure, try visiting
yourwebsite.com/sitemap.xmlin your browser first
- Most websites have sitemaps at:
- Click the "Submit" button
Step 5: Wait for Data
After setup is complete:
- Google will start collecting data about your website
- It may take a few days to a week before you see meaningful information
- Check back regularly to monitor your website's search performance
What to Do If You Run Into Problems
DNS Verification Issues:
- Wait longer (DNS changes can take up to 24 hours)
- Double-check that you copied the entire TXT record correctly
- Contact your hosting provider for assistance
Sitemap Issues:
- Try different sitemap URLs:
sitemap.xml,sitemap_index.xml, orwp-sitemap.xml - Check if your website actually has a sitemap by visiting
yourwebsite.com/sitemap.xml - Contact your web developer if you're not sure about your sitemap location
Still Need Help? If you encounter any difficulties during this process, please don't hesitate to contact us. We're here to help ensure your website is properly set up for search engine success.