How to Add or Delete a DNS Record in Godaddy
This guide will walk you through managing DNS records in your GoDaddy account. Don't worry if you're not technical - just follow these steps carefully!
What are DNS Records?
DNS records are like a phone book for the internet. They tell browsers and email systems where to find your website and how to deliver your emails.
Part 1: Accessing Your DNS Settings
Step 1: Log into GoDaddy
- Go to www.godaddy.com
- Click the Sign In button in the top right corner
- Enter your username (or email) and password
- Click Sign In
Step 2: Navigate to Your Domains
- Once logged in, click on your name or profile icon in the top right
- Select My Products from the dropdown menu
- You'll see a list of all your domains

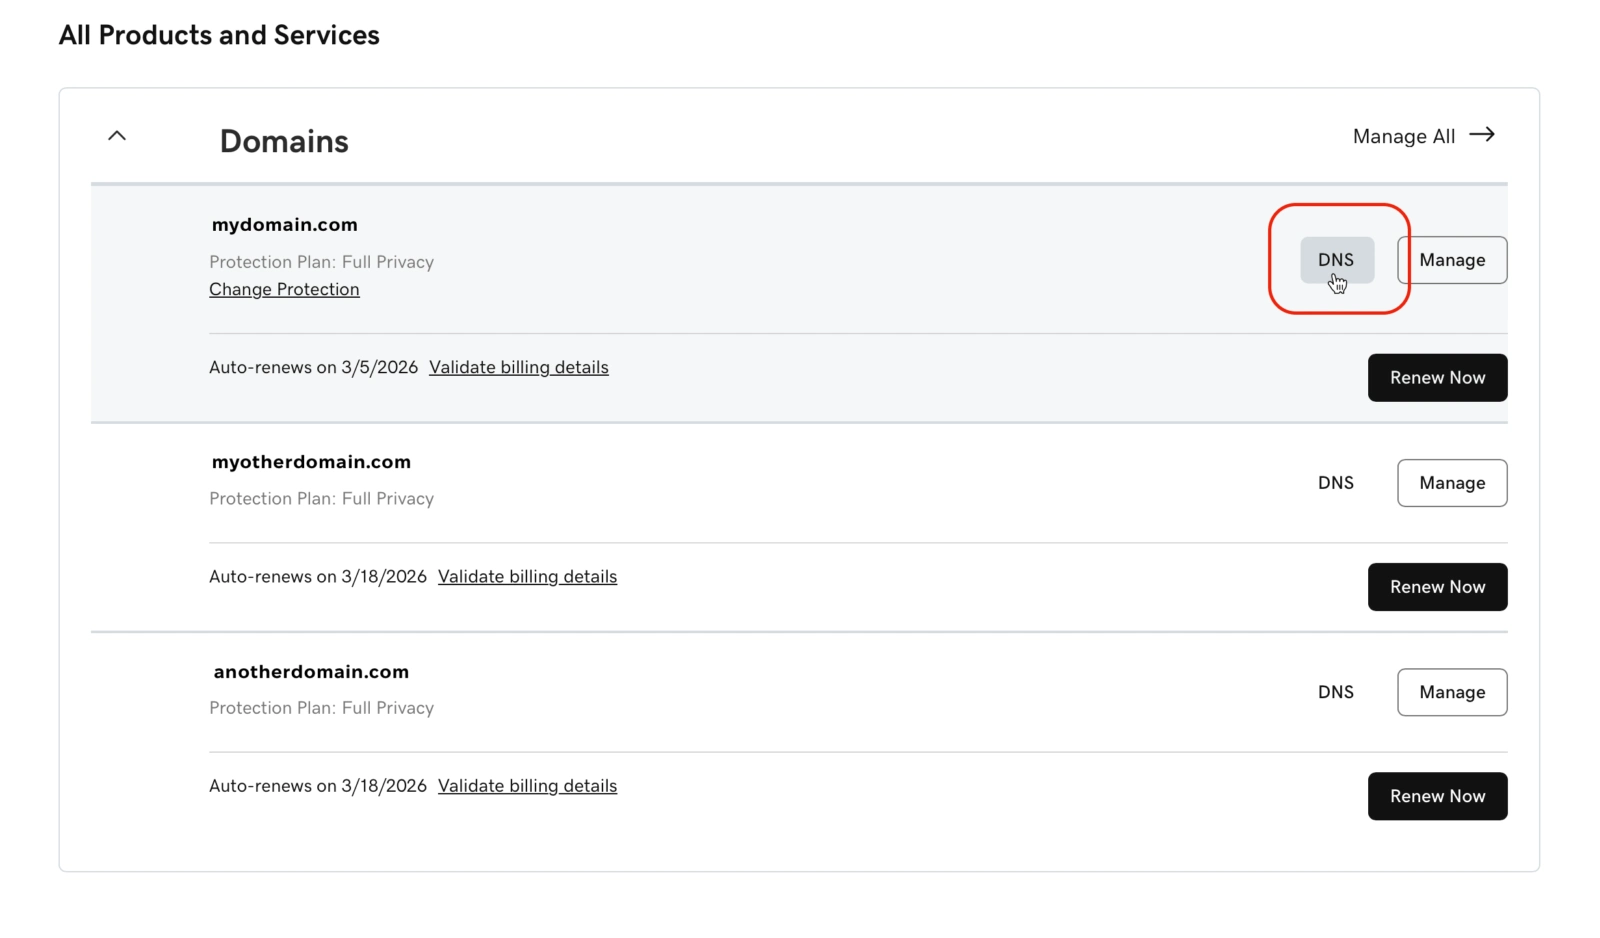
Step 3: Access DNS Management
- Find the domain you want to manage
- Click the DNS button next to that domain (it might also say "Manage DNS")
- You're now in the DNS Management page!
Part 2: Adding a DNS Record
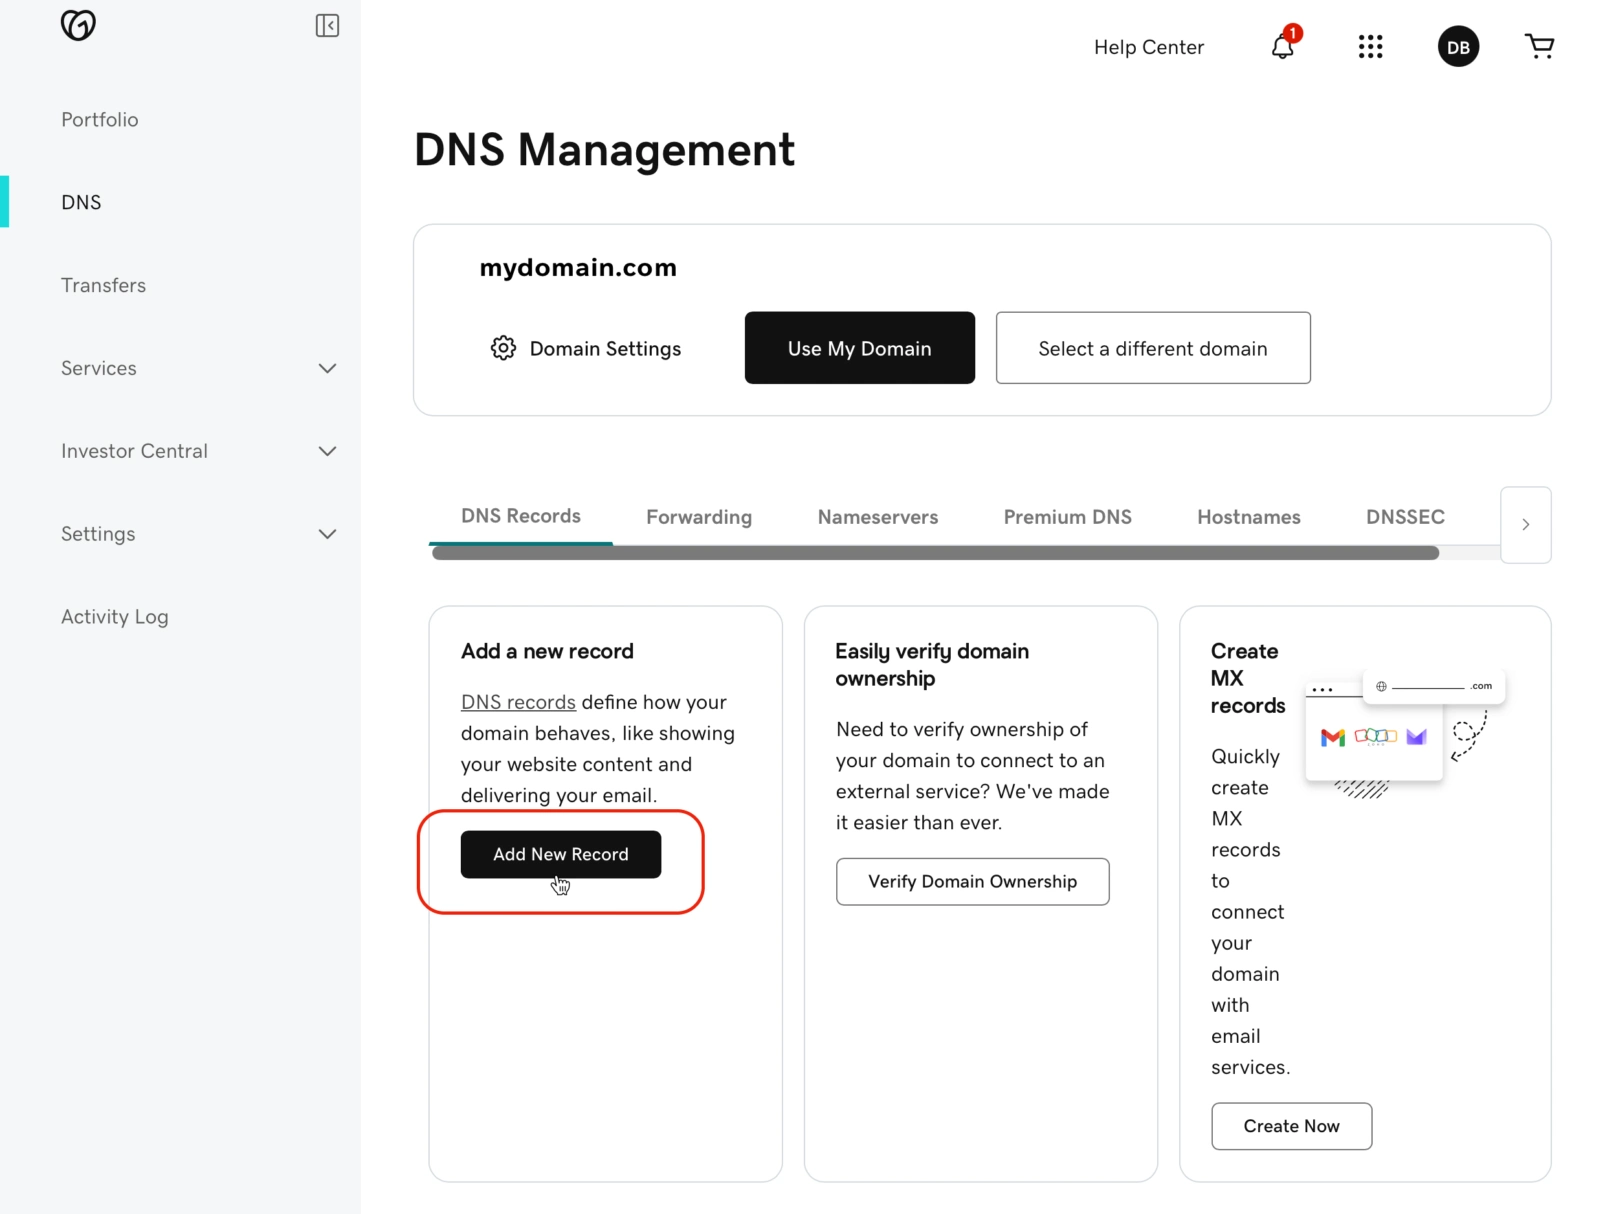
Step 1: Start Adding a Record
- On the DNS Management page, scroll down to the DNS Records section
- Click the Add button (usually says "Add" or "Add New Record")
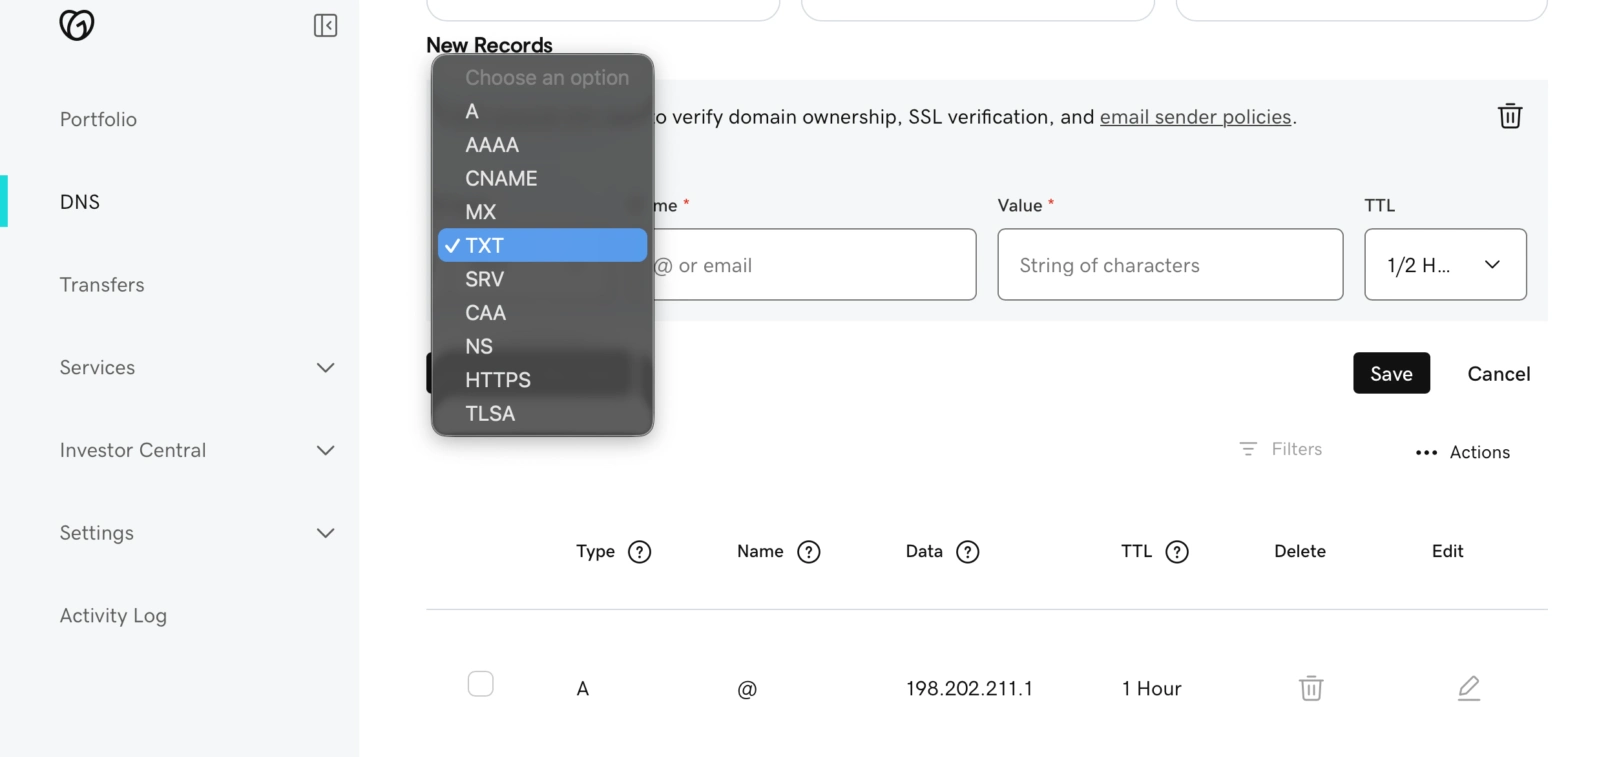
Step 2: Choose the Record Type
You'll see a dropdown menu with options like:
- A Record - Points your domain to an IP address (most common)
- CNAME - Creates an alias to another domain
- MX - Directs email to mail servers
- TXT - Adds text information (often used for verification)
Select the type you need based on what you're trying to do.
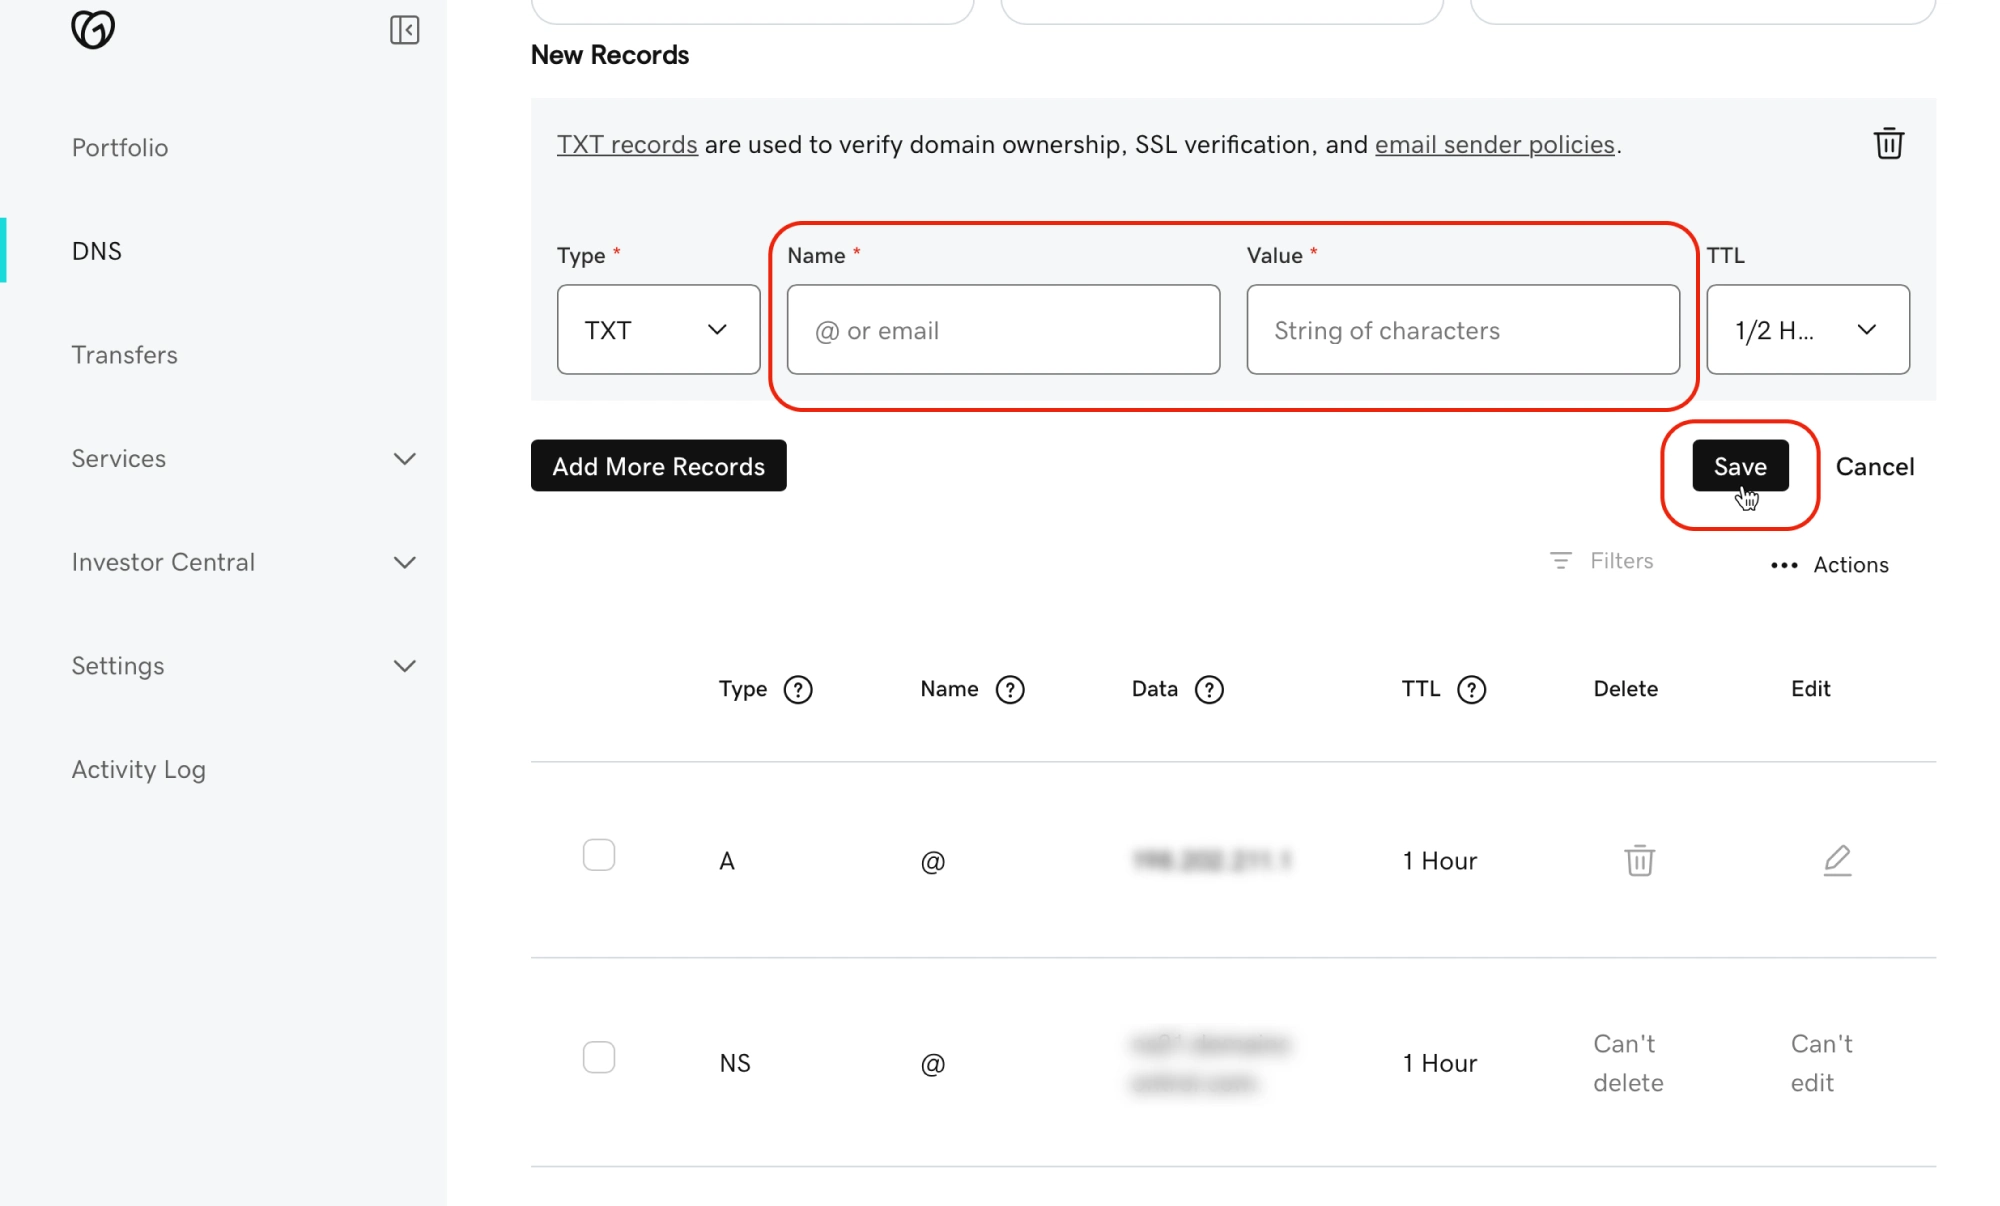
Step 3: Fill in the Details
The fields you'll see depend on the record type, but typically include:
For an A Record (most common):
- Name/Host: Enter a subdomain (like "www" or "blog") or use "@" for your main domain
- Value/Points to: Enter the IP address you want to point to
- TTL (Time to Live): Leave as default (usually 1 hour or 600 seconds)
For a CNAME Record:
- Name/Host: Enter the subdomain
- Value/Points to: Enter the domain it should point to
- TTL: Leave as default
For an MX Record:
- Name/Host: Usually "@" for your main domain
- Value/Points to: Your mail server address
- Priority: A number (lower = higher priority, like 10)
- TTL: Leave as default
For a TXT Record:
- Name/Host: Usually "@" or a specific subdomain
- Value: The text string you need to add
- TTL: Leave as default
Part 3: Deleting a DNS Record
Warning: Be careful when deleting DNS records! Deleting the wrong record can make your website or email stop working. If you're unsure, write down the record details before deleting, or take a screenshot.
Step 1: Find the Record
- On the DNS Management page, scroll to the DNS Records section
- Look through the list to find the record you want to delete
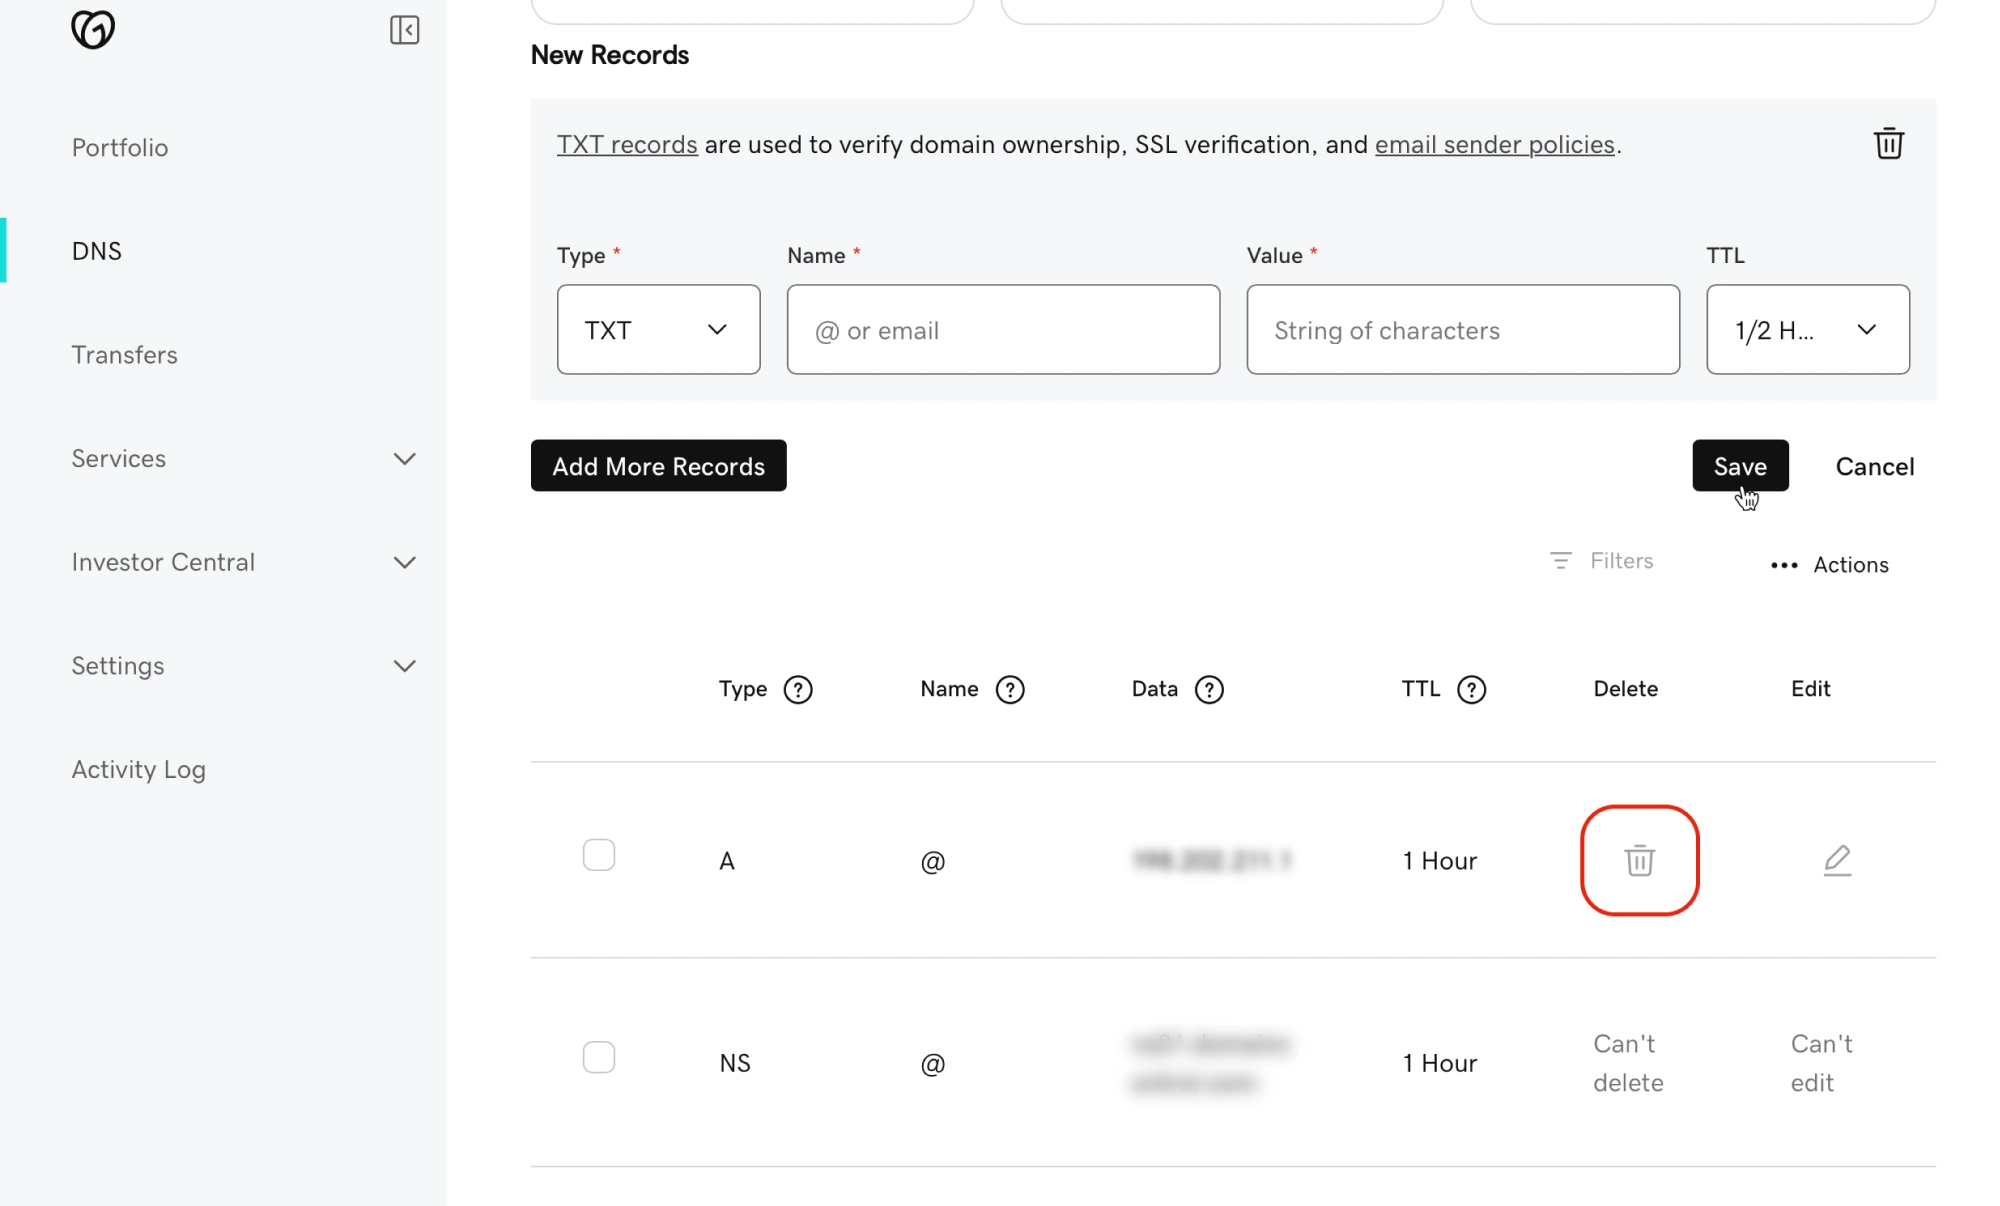
Step 2: Delete the Record
- On the right side of the record, you'll see a trash can icon or delete button
- Click on it
- A confirmation message will pop up asking "Are you sure?"
- Click Delete or Yes to confirm
Step 3: Verify Deletion
- The record will disappear from your list
- That's it! The DNS record is now deleted
Helpful Tips
- Take screenshots before making changes, so you can undo them if needed
- Don't delete records unless you're certain what they do - some are essential for your site to work
- Write down your changes so you remember what you did
- Wait 24-48 hours for changes to fully take effect
- GoDaddy Help is available - You can chat with support if you get stuck (look for the chat icon on their site)
Troubleshooting
Problem: My changes aren't working
- Solution: Wait longer - DNS changes take time. Check again in a few hours or up to 48 hours.
Problem: I can't find the DNS button
- Solution: Make sure you're in "My Products" and looking at your domains list. The DNS button should be right next to your domain name.
Problem: I deleted the wrong record
- Solution: You can add it back! If you took a screenshot or wrote down the details, simply add a new record with the same information.
Problem: My website stopped working after I made changes
- Solution: Check what you changed. You may have deleted or modified an important A record. Contact GoDaddy support for help restoring it.
Need More Help?
- GoDaddy Support: Available 24/7 via phone or chat through your account
- GoDaddy Help Center: https://www.godaddy.com/help
- Community Forum: Search for similar questions from other users
Remember: When in doubt, don't delete anything! It's always safer to ask for help than to risk breaking your website or email.
Still Need Help? If you encounter any difficulties during this process, please don't hesitate to contact us. We're here to help ensure your website is properly set up for search engine success.